
Upgrades
The Long-EZ is a great design – simple systems, relatively easy construction, and robust structure, all of which combine with some great handling characteristics. That said, there certainly is some room for improvement.
When Burt Rutan designed the plane, he wanted a simple to build, low-cost, lightweight plane with great fuel efficiency. He also lived in Southern California, which is actually quite important.
I suspect that when he designed the plane, he didn’t really take into account that the planes would be flying 30 years later, operating in all kinds of weather, and incorporating the latest technologies for avionics and engine systems.
As a result, many of us have evolved unique solutions to various challenges, or just added capabilities not originally envisioned when the plane was introduced. Below is a brief overview of some of the changes and improvements I have included for my Long-EZ. Some were my own creation, but the majority are the result of the fertile minds of others in the canard community.
Here is the list of changes and improvements shown farther down on this page:
Roncz Canard:
The original canard, usually called the “GU” referring to the GU-25 airfoil, was unique in that it had a stagnation point in the middle of the elevator. In other words, when flying in rain at 130 knots, a pool of water would form that was about ½” wide along the span of the elevator.
The canard design worked fine for Rutan in Southern California where it’s basically dry, but for those of us in places where it rains a lot, like the Pacific Northwest, the pitch changes encountered with the GU-25 were unacceptable. Because of this, Rutan teamed with John Roncz to create the Roncz Canard, which addressed the pitch changes.
I made the canard in 1999-2000, just after retiring from flying airshows, since I didn’t want to completely re-evaluate the aerodynamics of the new canard for aerobatics. I did most of the sanding while Kay was pregnant with Sean, which was OK since she slept a lot.
I didn't have time to do the final installation of the canard onto the plane until two years later, in 2002, since we were so busy learning how to be parents.
Electric Nosegear:
When I first got the plane in 1990, there were rumblings of pilots not liking the manual method of getting into the plane: lift the plane by grasping the canard, raising it to about waist height, then reaching in and cranking down the gear. To a 26-year old guy like me, it seemed easy and the people wanting complex, electronic solutions were out of shape and lazy. Fast-forward to 2007, and you’ll see that I installed one of the Wilhelmson units. Something about getting a little older and rupturing a disc in my back made it seem like a better choice than when I had first heard of it.
One of the biggest challenges I faced was how/where to run the mechanical back-up shaft. I already had a full panel, and there was no way to easily install a straight shaft to the drive motor, so I added a second u-joint, allowing me to move the handle off-center. This new degree of freedom, however, required that I constrict the range of motion of the fist shaft segment. My solution was a small aluminum block attached to the lower corner of the radio stack. Not a great structural solution, but since I would only need to use it possibly once in the lifetime of the plane, probably sufficient.
Interestingly enough, on the very first test flight, the brand new circuit breaker for the gear failed, forcing me to crank down the gear.
I also modified my warning and caution panel to indicate gear status, including a flashing light for "gear in transit".
Torque Tube sealing:
Regardless of the type of canard, the gap around the elevator torque tube allows cold air to blow on the pilot’s legs. I devised a solution with an eccentric disc mounted to the torque tube that allowed it to be sealed with a simple fiberglass capture structure.
I had to make a small incision on each side into the canard to enable the disc concept to work. Overall, the design achieves its goal, but removing and installing the canard is made more complicated.
Electric speedbrake and automatic retraction:
I never liked the original mechanical speedbrake design. Although it’s “automatic” retraction feature, which was designed to allow it to blow closed around 90 kts was novel, extending it was a real bear, especially for someone with very long arms such as mine. Additionally, you had to reach around it to move the throttle.
During the big upgrade and overhaul in 1995-6, I installed an electric actuator for the speedbrake, freeing up the area under my left arm. Later, I found that by placing the actuation switch just in front of the throttles, I was able to deploy it without moving my hand. Additionally, I added a small mechanism to the throttle that would push the switch to the retract position when the throttle was advanced. This came in handy when I was instructing for Air Force Test Pilot School, with me in the back seat. My advancing the throttle would also retract the speedbrake.
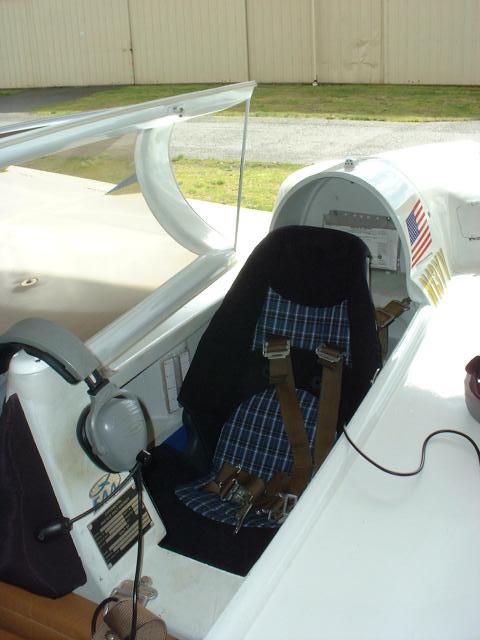
Rear cockpit rudder pedals:
After my first year at US Air Force Test Pilot school, I realized that the student pilots, although some of the best in the world, weren’t familiar with differential braking (one of them almost hit a parked helicopter). I then devised a means to have back seat rudder and brake pedals that although not the most comfortable or ergonomic, were at least functional. They are held in place with three screws per side, plus a single bolt to attach them to the existing brake cables.
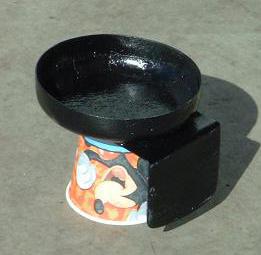
Drink holder:
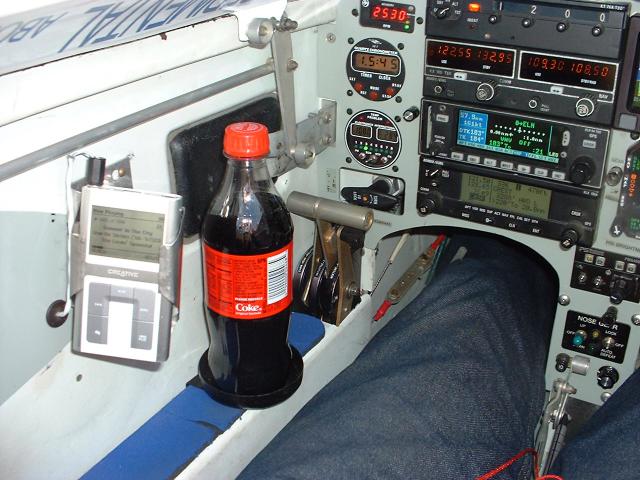
In some ways, this is my proudest accomplishment. After almost 20 years of spilling and nearly spilling nearly every type of bottled soft drink imaginable, I came up with a simple, light-weight solution.
The two primary requirements for this innovation were it had to handle drinks up to the 20-oz soft drink bottle, and it had to be removable, since the arm rests are narrower than most soft drinks. The result is the simple device pictured here.
In order to install it, all I had to do was sand the edge of one of my removable armrests where it butted the side of the fuselage, creating a narrow gap into which the holder can slide. The tab that is then wedged between the armrest and fuselage side then retains the drink holder.
Trailing Edge fences:
A theory has been put forward in the Canard community that having fences to stop span-wise flow would decrease minimum controllable airspeed, increase top-end speed, and make the pilot irresistible to women.
I made a set of the fences and devised a means to install them that allowed them to be quickly added and removed. As part of a US Air Force Test Pilot school class, as well as my own test, including tufting the wing, we determined that any changes to the performance were too small to measure.
It is worth noting that some meaningful data has been collected on VariEzes, which seem to derive a quantifiable benefit from the fences. The difference is believed to be due to the higher sweep angle of the VariEze’s wing.
I keep the fences on my plane because they don’t cause any negative effects, and above all, because they look cool.
Rear cockpit instrument panel:
I have gone through a variety of instruments for the back seat. Altimeter and airspeed are the obvious ones, and an instantaneous G-meter appealed to reporters and US Air Force Test pilot students. The one instrument that didn’t work out well was a magnetic compass – turns out that my headset has magnets in it, so moving my head would spin the compass.
Electric Fuel level measurement:
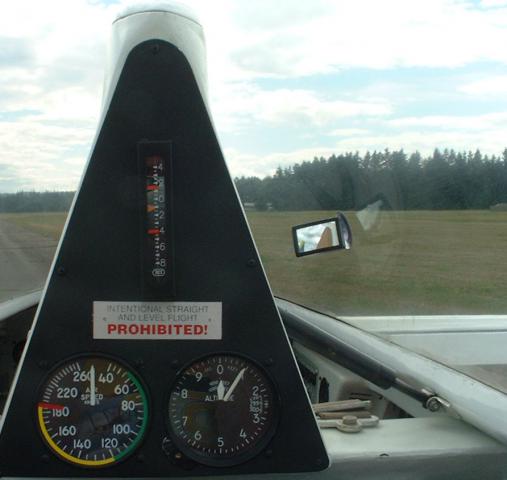
As with the electric nose gear, when I first got the plane, pilots were complaining about the challenge of looking over their shoulder to see the fuel sight gages. From my 26-year old perspective, they must all be fat, old or lazy. Well, 20 years on, at least two of the 3 apply to me… I can no longer turn my head far enough to see the sight gages in flight, and trying to read fuel levels through a reflection in a hand-held mirror just isn’t good enough.
I chose to implement the Electronics International capacitance measurement system due to it’s lack of moving parts. The challenge was how to mount the sensors so that they obtained good results, and to do the installation in such a way that I didn’t have to completely open the tanks. Although I did have some minor seepage around one sensor, after two tries at repairing it, I seem to now have a fuel-tight installation with good readings.
Warning and Caution panel:
The original Long-EZ plans laid out a simple switch-logic system to warn of just a couple of things: landing gear up, and taking off with the canopy open. Either of these would trigger a buzzer and light up a red warning light. In my case, especially at night, having either go off would give me a heart attack.
After a few years, I decided that a more logical way had to be developed, similar to what I had used in military and business jets, so I developed my own warning and caution panels. I created the panel shown in these pictures, initially using small incandescent lights obtained from Radio Shack for illumination, and the text was achieved by printing in reverse on tissue paper, which also helped to diffuse the light.
The drawback to the incandescent lights is that they burned out frequently, once helping to mask that I was trying to land gear up (I caught it in the flare). In 2002, I converted to LED’s. The good news is that these don’t burn out nearly as often (mean time between failure measured in thousands of hours), but because I need to take outputs from several different systems (my own microswitches, those on the gear actuator, voltage regulator designed to pulse incandescent bulbs), dimming them all consistently has proven a problem, since dimming LEDs to low light levels is a real challenge. Given that these lights are right in front of my face, this can be a real problem when flying at night.
Additionally, to get the light logic to work, I have to run some electromechanical relays, which are themselves prone to occasional failures.
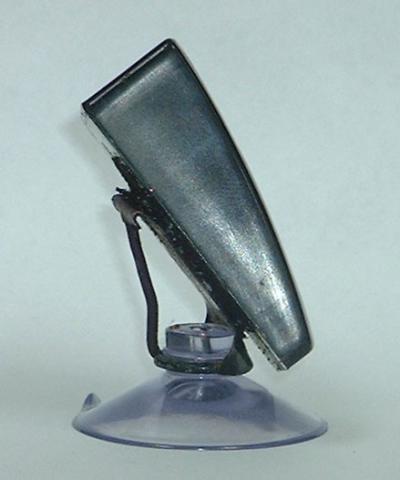
Kayvision:
After an incident in the first year I had the plane when an exhaust stack broke off and was hit by a prop blade, splintering it (something I didn’t discover until after I landed because I couldn’t see what was left of the prop), I created “Kayvision” – so named because I mostly use it to look at my lovely co-pilot, Kay.
It consists of a suction cup (the kind purchased in the check-out line of the hardware store), the wire which is normally a hook on the suction cup being straightened, then bent as needed, and one of the inexpensive wide-angle mirrors designed to be attached to the existing mirror on your car.
The completed assembly then attaches to the canopy on a direct line from my eye to the canard, so that it doesn’t block any more of my field of vision.
Child Seat Adapter:
My sons, Sean and Alex, have each been flying in the Long-EZ since they were a few weeks old. Initially, they flew on their mother’s lap. From the time that they were old enough to know what they wanted, they desired to fly on their own in the back seat. Kay and I set a goal of allowing them to fly on their own once they were 4, figuring that by then, they could communicate with me via a headset and not get too scared.
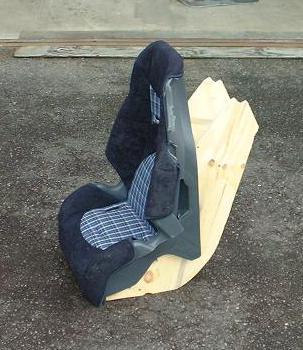
When Sean turned 4, I took him flying in the back seat. To help him see out, fellow Canardian Wayne Blackler and I devised a seating arrangement that involved foam pads, a bathroom stool, and an old tire. Although it worked, I figured there needed to be a more consistent, effective and safe solution. The result is the modified car seat pictured here.
Requirements for the seat adapter included:
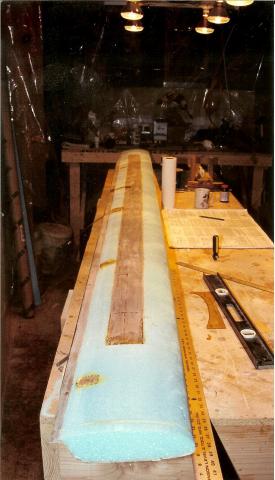


This is the canard foam core with the shear web and spar caps already in place.
Important lesson from previous projects:
Do all finish sanding outside to keep dust out of the house

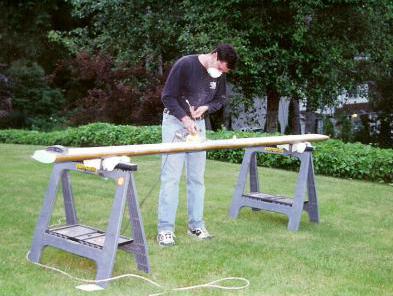
Now this is how to look stylish while sanding…
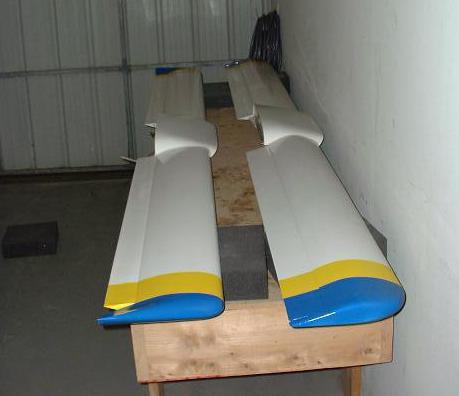
Left: new Roncz canard -- Right: old GU canard
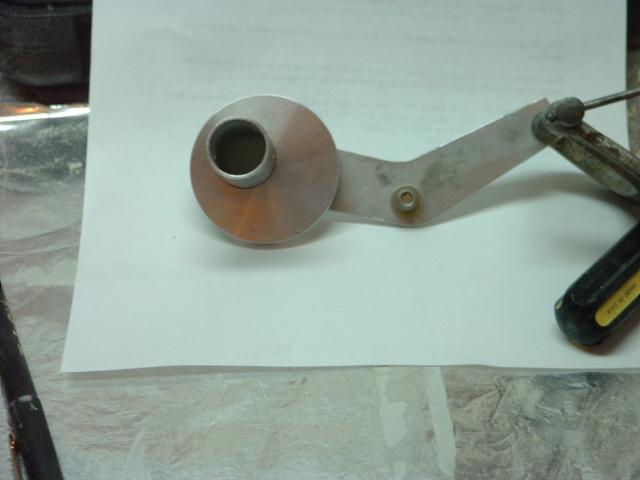
Eccentric disc on the bellcrank
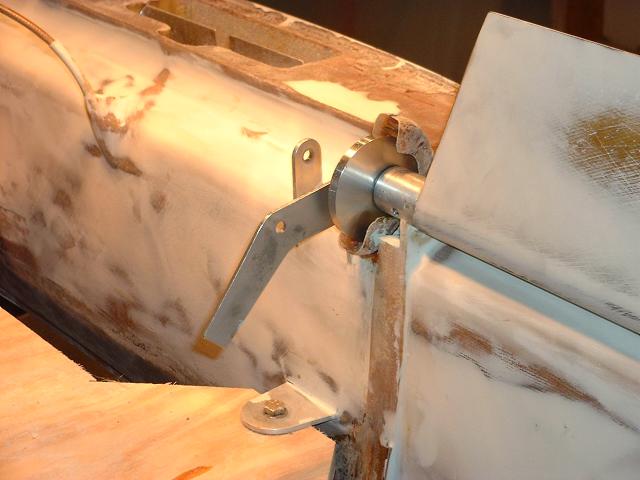
Eccentric disc installed on the elevator torque tube and located in the upper pocket.
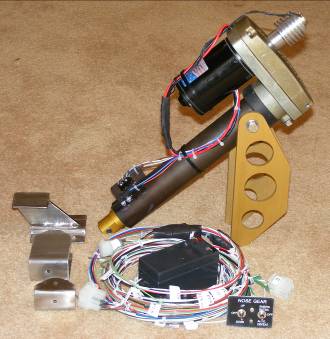
Nosegear actuator and associated parts as provided by Wilhelmson
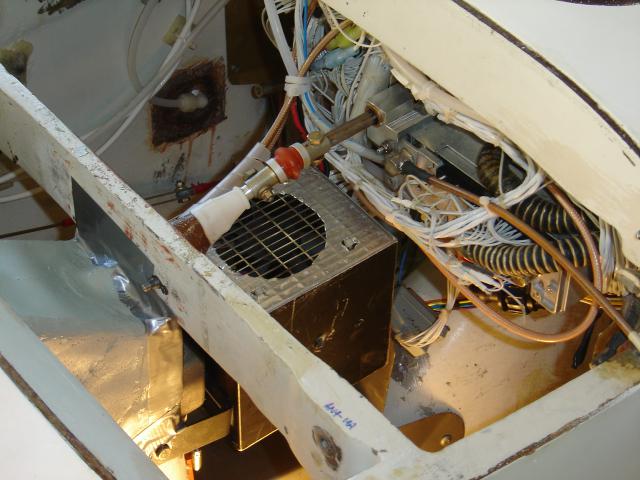
Alternate gear extension mechanism, including U-joint and retention black attached to the rear of the radio stack. The box with the grill immediately below the shaft is the inlet to an electric space heater.
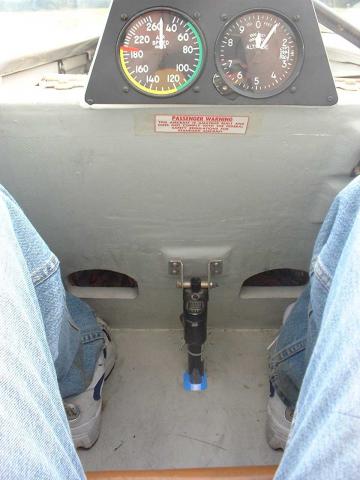
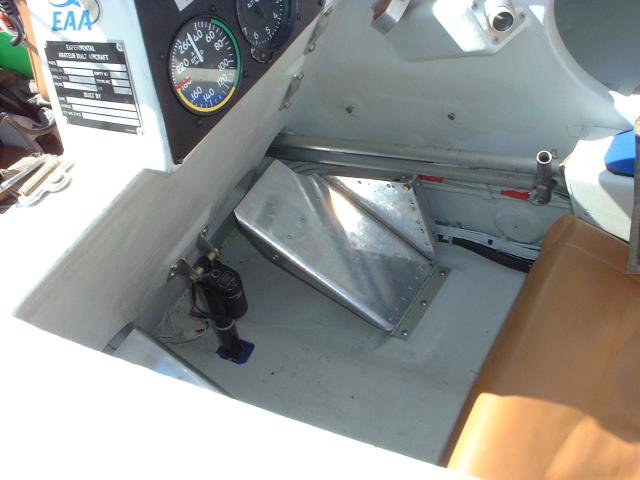
Electric speedbrake actuator on the floor between the passenger’s feet
Rear cockpit rudder/brake pedals manufactured from 1/8” aluminum. Side bracket provides lever arm to pull on ~8” cable segment, which in turn bolts to in-line attach plate on the existing front seat brake cable.
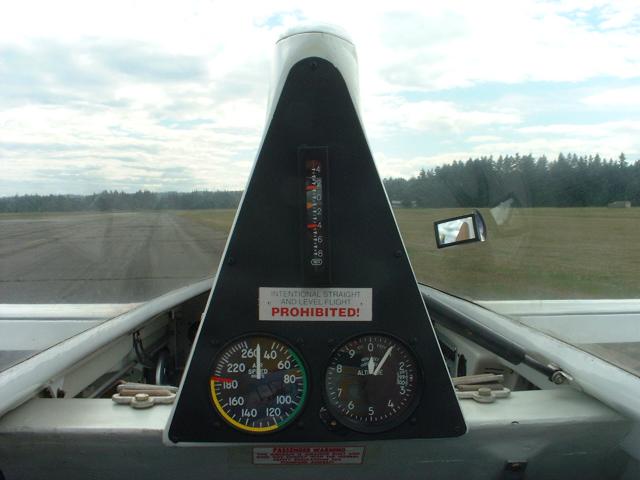
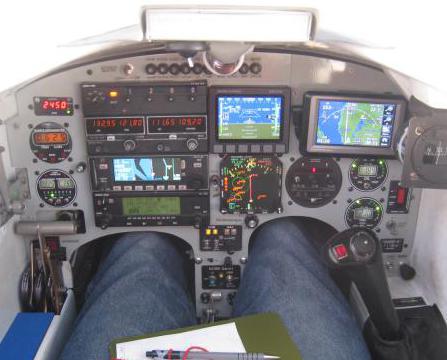
Rear cockpit instrument panel installed in the back of the pilot’s headrest. On top is an instantaneous G-meter, with airspeed and altimeter underneath.
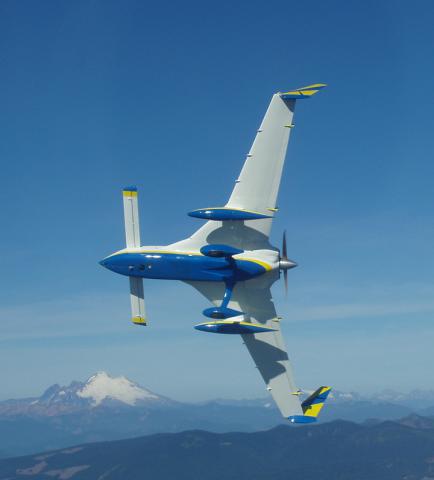
Trailing edge fences installed. Even though any performance improvements are marginal at best, I have kept them because they look good.
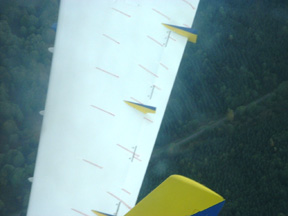
Picture of flow visualization with trailing edge fences installed. Shot through the baggage strake window of another Long-EZ.
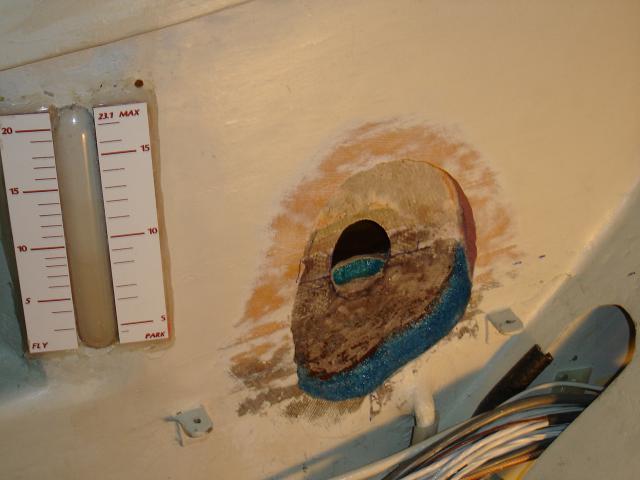
Fuel level sender temporarily inserted in the aluminum and fiberglass module intended to facilitate assembly and ensure correct probe orientation
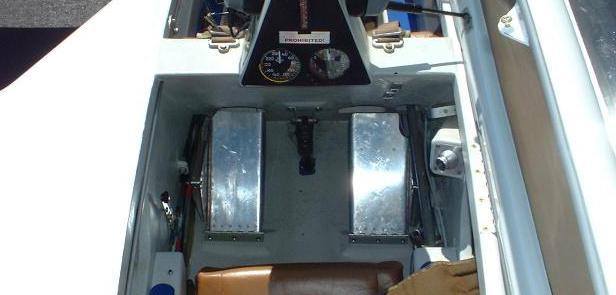
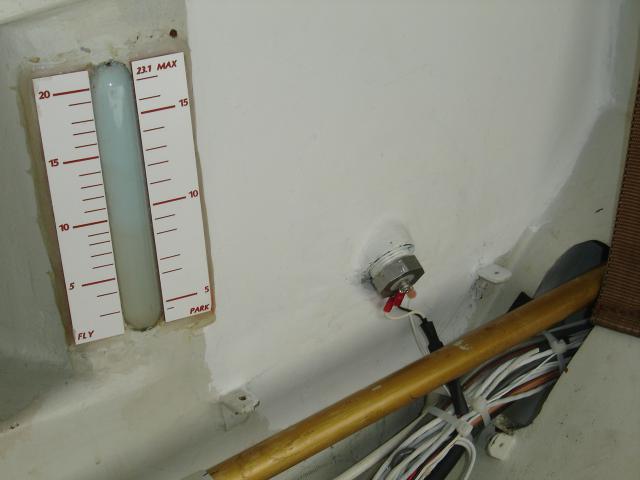
Finished installation. The metallic head of the probe is just above the level of the arm rest, so is covered by its own removable fiberglass cover
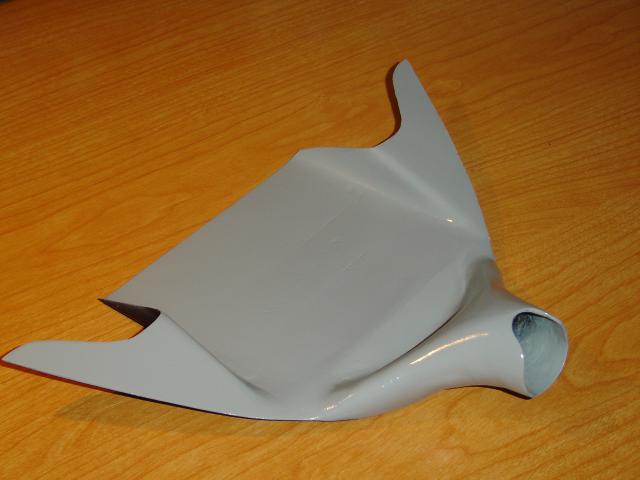
Shown is the fiberglass piece (laying on its back) that is a combination glareshield, defog plenum, and warning panel holder. The hole to the right enable air from the canopy eyeball vent to be directed along the canopy surface to provide defog/defrost.
Warning panel/glareshield is located so that it does not block instruments or view of circuit breakers
This image shows the simplicity of the design: a low-cost wide-angle mirror, attached to a small copper plate soldered to the re-bent hook, all supported by a simple clear suction cup as found at most hardware stores.
The view of Kayvision in place – located on the canopy in a direct line from the pilot’s eyes to the canard so that it doesn’t block any visibility.
Child seat installed in the back seat. It takes ~2 minutes to install or remove
Side view of the seat and adapter plates – plywood shaped to exactly match the shape of the cockpit floor and seat backs
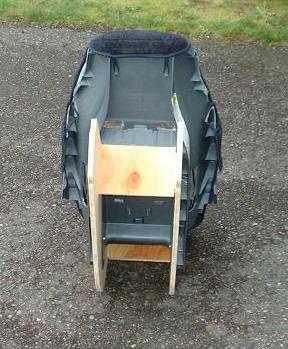
Rear view showing the adapter plates and cross-braces. Entire mechanism attaches to extruded plastic ribs that are part of the seat itself.
Drink holder bowl, sized to hold 20-oz bottle, and 90-degree flange that slides between arm rest and cockpit side
Drink holder in place, in use, and in flight. Throttle and mixture can still be reached used, but drink holder is only appropriate for use in cruise.
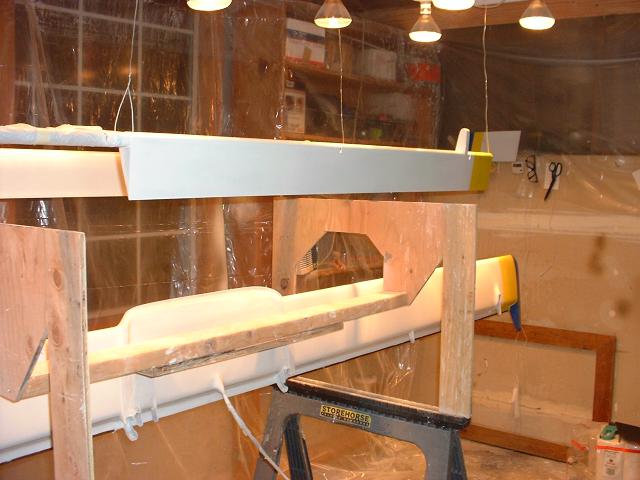
The canard and elevators in the paint booth I made in my garage
FLocation of the fuel level sender. This method enabled all work to be done from the inside of the cockpit and maintain fuel tank primary integrity.
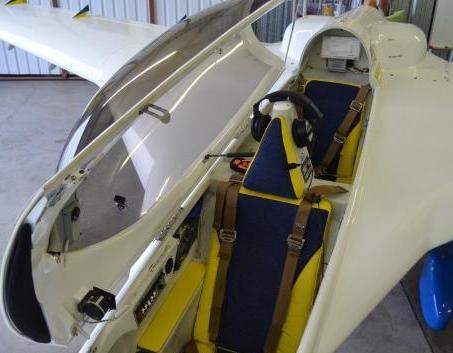
New seats and arm rests:
After 25 years of sitting on the same seats, I figured it was time to get something a little (OK, a lot) more comfortable.